Showing posts with label Vera Lane Studio. Show all posts

Wednesday, April 29, 2020

April Cookies / 2020 - 3

The latest Challenge at If You Give a Crafter a Cookie is all about droids, wookies and princesses. I know everything about those because my guy is a bit of a Star Wars fan !! We hope that you will link up a project of your own for Challenge #141 - you have through May 13 to show us that the Force is with you !!


I'm a Star Wars fan too but also a fan of the late Carrie Fisher. So for my project, I chose to make a card with the image of Princess Leia. And I used a digi stamp set  from one of my favorite companies - Vera Lane Studio .The set also comes with a Yoda image and a second sentiment.  This card has my guy's seal of approval. I did honor his one request -- NO GLITTER !!!

  • I adhered a piece of galaxy-patterned paper to a white card base.
  • I printed the Leia design on a piece of Neenah Stardust White cardstock and fussy-cut the image.
  • The sentiment was printed on a piece of blue-green paper and trimmed to fit next to Leia.
  • Princess Leis was colored  with a variety of my favorite markers -  Staedtler, Faber-Castell  and Akashiya Sai .
  • I adhered the Princes towards the left side of the card and then the sentiment next to her towards the bottom of the card. 
  • Two sequins wee placed in the center of the 2 stars on the patterned paper.

Well, I hope that you like my project, whether you are a Star Wars fan or not. We will definitely be celebrating on May 4th with a Star Wars marathon - May 4th = May the Force Be With You ..  I'd love to see you link up a project in the next 2 weeks for this challenge. Also take a look at the other projects by my teammates over at If You Give a Crafter a Cookie .

Due to COVID-19, we are still staying home here in Virginia and I'm still working full time as a nurse. I'm not in direct patient care but I do work in the Telemetry Department  of my hospital remotely monitoring patients. I am hoping we have seen the worst of COVID-19 and continue to improve in our numbers so that we can soon lift  some restrictions. How are you doing these days ?? Are you more creative or more distracted ?? I really do alternate between both. But I knew I couldn't pass up this Star Wars theme..

Please take care and stay safe wherever you are.
Until next time, stay creative !!


Debra Davison / Meticulosity

Wednesday, January 22, 2020

January Cookies/ 2020 - 2

The latest Challenge - # 134 - at If You Give a Crafter a Cookie takes us back to the 80's !!  It's all about MTV, retro, Pac Man, boom boxes, mixed tapes etc.. I wasn't sure at first what direction I wanted to go in with this card but finally mixed up the theme of the 80's with the colors of the inspiration pic and came up with something a little bit Sassy !!


  • I chose the Vera Lane Studio digi stamp set Sassy for my card.The girl and the definition were printed onto Neenah Stardust White cardstock . I fussy-cut the girl and trimmed the definition to fit onto an A2 card base.
  • The washi tape was found in an Etsy shop and I just bought samples of each that were perfect for the theme !! I put strips of the boom box and headphones across the top panel of the definition and the sneakers across the bottom.
  • The girl was colored with a variety of my favorite markers.
  • The definition was adhered to a green A2 card base with my Pink ATG gun and then I popped the  girl up on the right side of the definition using foam tabs.
  • The patterned paper that my card was photographed on was sent to me from Brasil by my crafty friend, Michael Trent. It was exactly the paper for this card !! Michael is also on the If You Give a Crafter a Cookie Design Team and you can find his amazing creativeness at  World of Michael Trent .


This Challenge will run through Feb. 5 and we'd love it if you would post a project of your own . Take a look at the other team member's cards over at the Challenge Blog for more inspiration. 

Thank you for visiting Meticulosity !!
Until next time, Stay Creative ..
And a little bit Sassy !!!


Debra Davison

Wednesday, October 2, 2019

October Cookies - Take 1

As I sit here in Virginia Beach and write my first blog post of October, it is 90 degrees here !! Our inspiration photo is a beautiful photo of Autumn leaves & acorns and I am closing my eyes and wishing we had the temperature to match ..  


I remembered a fun Autumn-patterned paper pad that I found recently at Tuesday Morning and chose a wonderful piece with leaves on a text background. Then I saw a beautiful plaid piece in the same pad and decided to combine them. You know how I love mixing patterns !!


Cabin Rules
  • On a pale gray card base, I adhered papers from the Jen Hadfield "Warm & Cozy" paper pad. The plaid design was placed at the bottom and the leaf pattern at the top. I left a small margin around the edge of the card.
  • The girl is a digi stamp from the Vera Lane Studio "Teacher" set. I printed it onto Neenah Stardust White cardstock , fussy-cut it and colored it with a variety of my favorite markers - Akashiya SAI Waterbrush Markers & Zebra Mildliners .
  • I adhered the girl on the left side of the card and the sentiment on the upper right. The sentiment was also in the Warm & Cozy paper pad.
  • Festive Berries Distress Glitter added some bling to the girl's lips.
  • Several coordinating color rhinestones were placed on the plaid paper for some shimmer.
  • All items were adhered with Art Glitter Glue .
This Challenge #127 runs through October 16 and we would love for you to link up a project inspired by our beautiful Autumn photo. And be sure to check out all of the creativity by my fellow Design Team members over at IF YOU GIVE A CRAFTER A COOKIE .  Thanks so much for visiting me again at Meticulosity . 

Until next time, Stay Creative !!

 Debra Davison

Sunday, August 25, 2019

Coffee & Cards With Deb & Celeste / August

I'm excited that Celeste is back for our our latest post of Coffee & Cards !! This time I chose a Sketch Challenge because I am not very good with them and wanted to think outside the box and out of my comfort zone.  I chose a fairly simple one  but still struggled with ideas. Then I spotted a piece of hoarded paper and my idea took off from there !! 


  • A piece of double-sided Basic Grey Oxford Study Hall paper was trimmed to fit a pink card base. I cut 2 pieces the exact same size and then cut each of the papers on a diagonal . I cut them so I could have the two patterns of the double-sided paper on the front of the card - the books at the top and the floral at the bottom of this card and the reverse on the next one I make.
  • I printed the image with the books and the sentiment from the Teacher no.2 stamp set by Vera Lane Studio  on Neenah Stardust White cardstock.
  • I fussy-cut the woman and trimmed the sentiment .
  • The images were colored with glitter markers and Faber-Castell PITT Artist pens.
  • I adhered the woman to the right side of the card and the sentiment on the upper left. 
  • Glossy Accents were added to the lenses of the glasses.


Celeste is much better at Sketch Challenges than I am, so I'm excited to see what she came u with !! You can find her post at  Crafting Junky . Brian made my coffee today in our French Press - standard Folger's coffee with a bit of sugar and some Half & Half. It was actually very good !!


Thanks so much for stopping by and seeing what Celeste and I are up to this for our August post We hope that you come back next month to see what we create for September !! It will be Pumpkin Spice Season by then !! Are you a fan ?!?!?! 


Debra Davison / Meticulosity

Wednesday, June 12, 2019

June Cookies - Take 1

I loved the picture for this Challenge because I really did have the BEST Dad ever !! He was my hero, my best friend, my reading buddy. He always made me feel better no matter what and I miss him every day.  I was only lucky enough to have him for 17 years but I cherish every memory of us together. And every year for Father's Day, I make a card that I know he would love. I hope that you love it too !! 


My dad and I were inseparable. He loved to read and passed his love of books on to me. We walked to the library several times a week . I can remember that long before I could actually read,  I would sit with him and hold my book, turning the pages when he did. To this day, I still sometimes find myself wishing I could tell him about a fantastic book that I've just read.  I wonder what he would think of my 2 e-readers . Probably would not be a fan !! My card today celebrates my love for my father and our shared love of books.  I used the perfect digi-stamp sets from Vera Lane Studio :  Father Daughter and Book Lover. 


This Challenge will be live for 2 weeks so link up a project by June 27. Show the fathers in your life how much they mean to you with a fun project !! And don't forget to take a look at all of my teammate's creativity over at If You Give a Crafter a Cookie . 

Until next time, Stay Creative.

Debra Davison / Meticulosity

Friday, January 25, 2019

Crafty Elves' Countdown to Christmas - January

A question was asked about crafty New Year's Resolutions in one of the Facebook groups I frequent . I responded that I wanted to make 1 Christmas card each week so I would have about 48 cards when the holidays rolled around.  And knowing that I can usually make more than 1 card at a time, I figured I could get a bit more than that. Turns out I am not the only one who thinks this way. Lisa Reynolds Bzibziak replied immediately and said she wanted to do the same thing. I know Lisa from the Coffee Loving Papercrafters Facebook page . So, what started out as a promise to keep each other focused on making a card a week has turned into a monthly blog post of our holiday cards !! We are the Crafty Elves and our little mascot is this cute Crafty Little Elf  from Unity Stamp Company. She will help us count down the weeks until Christmas card sending season arrives !!


I made a variety of cards for the first month. I placed stamps,papers, embellishments, adhesives and dies in a photo box along with card bases ( some made by me, others pre-made ) so  I always had everything handy. I made 2 of the cards when I just sat down with the intention of making one of my Christmas cards. The other 2 were made along with other cards when I was also completing some deadlines for Design Teams I am on. I am not going to be giving detailed instructions/supplies used for each card but feel free to ask me about any details. I will be listing the stamps I used under each card's photo.


Stamps Used:
Digi Stamp Set


 Stamp Used :


Stamp Used:


 Stamp Used :


Glitter highlights on roof,fence


   Glittered foam on my latte                                   


I actually made 8 more cards this month for a total of 12. These were some of my last minte designs at the end of 2018 so I had all of the supplies handy. I can't wait to see what Lisa makes and hope that you will go to her blog at Life of a BZ Scrapper to check out her creations !! We will be posting each month on the 25th and would love for you to join us by starting your Christmas cards early too. In order to help you, we will both be having a giveaway. Comment on our posts and you will have a chance to win a fun holiday stamp to get you started. I will be sending my winner our mascot Crafty Christmas Elf . Comment by the end of January and we will announce winners the first week of February.

Crafty Little Elf


Thank you for visiting Meticulosity.
Lisa and I hope you will join us each month for the Crafty Elves' Countdown to Christmas


Debra Davison / Meticulosity

Friday, November 30, 2018

2018 Fall/Winter Coffee Lovers Blog Hop #1

This is absolutely one of my favorite times of year and this Blog Hop has so much to do with that !! There are always hundreds of amazing projects linked up and I am always inspired !! And this year there are 86 Super Sponsors with some amazing prizes !! I have been playing with some long hoarded paper lately and came up with this cute design for a Coffee ATC Swap that I am participating in .. It is red and sparkly - 2 of my all-time favorite things !!! I hope you like it  as much as I do . 


  • I covered an ATC card with the red sparkly checked pattern from Mrs. Claus's Kitchen Stack by DCWV. I have long hoarded this 12x12 paper stack but it was perfect for this ATC !!
  • I placed a strip of Simple Stories "Merry & Bright" washi down the left side of the ATC.
  • I printed the Coffee Cup digis onto Neenah Stardust White cardstock, fussy-cut them and then colored them.
  • I used Faber-Castell PITT Artist pens,Akashiya SAI Waterbrush markers, Sharpies & BIC Flair Pens to color the images.
  • The cups and sentiment were adhered with Tombow Mono Adhesive + Permanent Runner .
  • The sentiment is from the Vera Lane Studio Barista set. Also printed on Neenah Stardust White cardstock.
  • I used my "dirt" stamp to make the sentiment a bit vintagy -- with Juniper Ranger Adirondack ink.
  • Simple Stories "Merry & Bright" sticker was placed at the bottom right side of the sentiment.
  •  A Wink of Stella Glitter Brush Marker was used to create some shimmer on the cups .


Please leave me a comment and let me know what you think of my first Blog Hop project !! I'd also love for you to follow my blog if you don't already/. At the end of the Hop, I will be choosing a winner at random for a bit of holiday blog candy, from those who leave comments!!


Thank you so much for visiting Meticulosity and a great big shout-out to Amy Tsuruta from the Coffee Loving Papercraters Facebook Page for again hosting another of these fabulous Blog Hops !!     

Debra Davison / Meticulosity

Tuesday, November 20, 2018

Vera Lane Studio - Take 3

For my third week as Guest Designer with Vera Lane Studio , I'm thrilled to be using a new holiday set - Mr. and Mrs. Claus. I wanted to make something to display on the table in my front hall and decided to alter a word block that I was lucky enough to find for 60% off. I loved the pick-up truck on top and could imagine Mr. and Mrs. Claus driving along a snowy road, bringing their tree home in it. After all, the elves can't do everything !!


  • I traced the outline of the word block and cut a piece of snowflake paper and a piece of white glitter paper to create the base for my scene.
  • I adhered the snowflake paper to the top of the block and then cut the glitter paper to look like a hillside and adhered that at the bottom.
  • Any rough edges were sanded down with my sanding block.
  • In addition to the  Mr. and Mrs. Claus set, I also used the Christmas set for the star and the It's Good To Be Home set for the trees and house. 
  • I printed the elements on Neenah Stardust White cardstock, fussy-cut the images and then colored them with my favorite Akashiya SAI brush markers, Faber-Castell PITT Artist pens , Brea Reese markers and Sharpies.
  • All images were adhered with Tombow MONO Aqua Liquid Glue.
  • A variety of candy dots and rhinestones were placed on the trees  for a festive look.
  • Clear Glitter Wink of Stella was placed on the star and also Mr. Claus's mustache.
  • Picket Fence Distress Stickles were placed on the lenses.
  • I placed a strip of glitter washi across the top and bottom of the sentiment.
  • To finish, I placed a strip of Tim Holtz Holiday Word  washi tape along the right and left side and the bottom of the block .


This project was such fun to make !! I can't wait to decorate my table for Christmas and display it. I will at least wait until Turkey Day is over .  These Mr. and Mrs. Claus images would also be really cute for holiday cards . Take a look at all of the great stamp sets and collage sheets in the Vera Lane Studio Etsy Shop. Maybe you should think about buying yourself some early Christmas presents !! Digi-stamps are cost-effective and don't take up any room in your house !!! I'm excited to see what the Vera Lane Studio Creative Team does with Mr. and Mrs. Claus.


Thank you for once again for visiting Meticulosity . I am grateful for everyone who follows my blog and/or Instagram pages. Also those of you who I know from Facebook. It's wonderful being able to share my creativity and love of paper-crafts with all of you !! Have a wonderful Thanksgiving and I will see you back here soon !!


Debra Davison / Meticulosity

Tuesday, November 13, 2018

Vera Lane Studio - Take 2

Choosing my second project as Vera Lane Studio's November Guest Designer was a no-brainer. I have been wanting to play with these images for awhile . I just never had a clue that I was going to alter the set like I did !! I used the Succulents Set, which contains 10 images and 2 sentiments. But when you see my card, you will see just how much fun I had with these images.


  • On a Kraft card base, I adhered a piece of patterned paper from the Collage Art Paper Stack by Die Cuts With A View. This stack has beautiful papers that look like mixed-media backgrounds and I am absolutely in love with them !!
  • I printed the images from the Succulents set and the sentiment and cup handles from the Coffee Cup Collection set onto Neenah Stardust White cardstock.
  • I have always thought that the pots that the succulents were in would make fabulous coffee cups. So, I cut the succulents off ( saving them for a later project, of course) . I then matched up some handles from the Coffee Cup set and cut those out too. You could also draw the handles and cut them out but my drawing ability is slim to none !!
  • Using a variety of markers - Sharpies, BIC markers, Faber-Castell & Akashiya SAI, I colored the  cups. 
  • The handles were adhered to the pots and like magic, I had coffee cups !!
  • I stacked the cups on top of the saucer, finishing with a plain cup that I decorated with a few strips of washi tape !!
  • I mounted the sentiment words onto pieces of Pink and Royal Blue glitter cardstock and then adhered them to the patterned paper next to the cup stack.
  • All items were adhered with my Tombow MONO Adhesive + Permanent Runner .
  • This is the Succulents  set that I used to make the coffee cups :

Thank you for once again visiting Meticulosity as I create some fun projects with Vera Lane Studio. I will be back throughout the month of November and will also be sharing some of their great new releases. Let me know what you think about my "unique" coffee cups !! See you again and in the meantime, Stay Creative !!


Debra Davison / Meticulosity

Tuesday, November 6, 2018

Vera Lane Studio - Nov. Guest Designer

I have fallen in love with the digi designs at Vera Lane Studio . They are fun, quirky and one-of-a-kind !! Their digi stamps and collage sheets have found their way into many of my recent projects.  They have some fantastic coffee-themed stamps and you ALL should know by now that I am a lover of ALL things coffee !! So when I was asked to be their Guest Designer for the month of November, I didn't hesitate . I will be making something every Tuesday and will be blogging it as well as posting on Social Media. I might even sneak a few extra projects in too !!

For my first project, I am using a new release - Cocoa and Latte . I  am sure that their Design Team members will also have fun with these images. I wanted to make a Fall project and decided to do a fun tag with lots of dimension.


  • I printed the larger Latte Fairy and sentiment on Neenah Stardust White cardstock. The fairy was also printed on a sheet of patterned paper  of Fall words and a sheet of whitish fur-patterned paper.
  • On an oversized tag, I placed a layer of brown patterned paper. 
  • I stenciled a floral pattern using Brea Reese Gold Metallic Texture Paste and then sprinkled a bit of glitter over the paste.
  • A strip of Fall Polka-Dot patterned paper was placed along the Left side of the tag on top of a piece of gold mesh. I stapled the mesh onto the tag in areas that would be covered by the Latte Fairy.
  • I paper-pieced the cup and the Latte foam after coloring the rest of the image with a variety of my favorite markers-Faber-Castell, Brea Reese & Akashiya SAI Brush Pens.
  • A piece of orange/black twine was wrapped around the top of the tag several times. 
  • A  strip of dark red glitter washi was placed down the Left side of the sentiment and adhered to the upper Right side of the tag. I also used a background stamp called Dirt on the sentiment.
  • White Lightnin' Glitter from Double Trouble Scrapbooking  was applied to the Fairy wings.
  • I made the eyes of the Fairy with a round pencil eraser dipped into a green stamp pad !!
  • The completed Latte Fairy image was popped up at the bottom of the tag with Foam Tabs. All items were adhered with Tombow Adhesives, except for the tiny staples by Tim Holtz Idea-olo
  • I placed several Prima "Amber Moon" crystals down the strip of Polka-Dot paper. 


Vera Lane Studio has a variety of fabulous digi stamps in their Etsy Shop. I am thrilled to be able to show you their fun styles this month !! They have a business page on Facebook , as well as a fun community of Vera Lane lovers  in a Closed Group .We share our projects and have monthly swaps. The theme of this month's swap is Coffee !! Stay tuned for more new releases.throughout the month amd projects from me.  And thank you so much again for visiting Meticulosity !!


Debra Davison / Meticulosity

Sunday, October 28, 2018

Coffee & Cards with Deb & Celeste 10/27

I try not to always be so darn predictable, BUT October is just full of such amazing Halloween images !! So Celeste and I have invited our friend Michael of  World of Michael Trent to join us again as we create some fun projects for this month's collaboration !! And the theme is Halloween and all things spooky !!!

I knew I wanted to use the fun Skullies digi stamps from Vera Lane Studio and then had the idea to pair them with the cute witches from Vera Lane's Bewitchingly Cute set. So, I basically cut the heads off of those cute little witch's bodies and attached skulls !! Sounds like Halloween to me !!!


Lost in the inky darkness ...

Most delicate of beasts ...

  • I adhered Halloween paper from the Love, Nicole " Dark Shadows"  paper pad to 2 ATC cards fronts.
  • The skulls and witches were printed on Neenah Stardust White cardstock and then fussy-cut. 
  • I colored the images with a variety of my favorite markers - Sharpies, Flair pens, Faber-Castell markers and Distress markers - then attached the skulls to the bodies with double-sided tape.
  • I die cut the tombstones, fences and ghosts from the Sizzix Thinlits Die Set "Village Graveyard".
  • I adhered Halloween washi to each card and then attached the fences with tiny staples, positioning the staples where I would be adhering the bodies so that they would not be visible. 
  • I used Tombow MONO Aqua Liquid Glue to adhere the tombstones and skeletons to the ATC cards. 
  • Tim Holtz Idea-ology sentiments/words were placed on each ATC card to match the scene.
  • I adhered another ATC to the back of my finished card to make it a bit more sturdy.
  • I stamped a Handmade Card image from Catslife Press on the back of my completed ATC.
  • A bit of Halloween washi was added to one of the ATC backs.

I really had SO much fun making these ATCs !! They were made for the Monster Mash Swap in the Vera Lane Studio Digi Stamp Group on Facebook.  Vera Lane Studio has the most fun, quirky, unique digi stamps !! Check them out and get inspired !!

I can't wait to see what my fellow crafters come up with for this month's collaboration. Take a peek at Crafting Junky for Celeste's and then head on over to World of Michael Trent to see what Michael has created.  

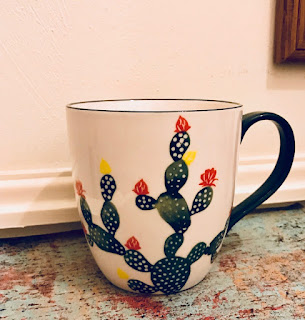
I have to thank Michael for my choice of coffee cup this time .. He showed me a new cup of his and I remembered one I had bought at Hobby Lobby on clearance sooooooooooooooo - we are cactus  twins !! I am drinking Fortune Cookie coffee  from As of Latte and it is amazing !!


Thanks so much for stopping by to see my ATCs along with Celeste and Michael's projects !! Do you make Halloween cards?? Are you a fan of ATCs ?? I enjoy creating on a smaller medium once in awhile and also joining in on ATC Swaps. Well, my coffee is waiting . Grab a cup of your favorite beverage and get creative.Until next month -- stay creative !!

Debra Davison / Meticulosity

Wednesday, October 17, 2018

October Cookies - Take 2

Of course we would have to do something  Halloween - themed for the latest Challenge over at the If You Give a Crafter a Cookie blog. Witch's hats, Spider webs, Jack-o-lanterns !! Orange and Black and White. There is so much you can do with these .. And the cookies - as always - look amazing !!


I found the cutest witch by Vera Lane Studio and just had to turn her into a card for a sweet friend !! She was so much fun to color and I got to use my favorite Halloween washi again too !! 


  • On a black chalk-board card base, I placed several coordinating strips of Tim Holtz Idea-ology "Materialize" Design Tape across the bottom .
  • I printed the digi witch from the Bewitchingly Cute set by Vera Lane Studio and the sentiment from the Wee Witches set, also by Vera Lane Studio,
  • I cut out the sentiment to fit on the left side of the card base, leaving space to place a strip of Tim Holtz "Materialize" Design Tape along the side.
  • The witch was fussy-cut and then colored, using a variety of my favorite markers - Sharpies, Flair pens,  and Faber-Castell .
  • The sentiment and witch were adhered with Tombow Mono+ Adhesive Runner and Tombow MONO Aqua Liquid Glue.
Our wonderful sponsor this time is Little Blue Button Stamps . If you link up a project with our Cookie-inspired theme, you could win a prize from them !! This challenge runs for 2 weeks so be sure to link-up before November 1. Now head on over to the BLOG to see what my teammates have created for this spooky Challenge !!

Thank you once again for coming to visit Meticulosity !! I've been busy creating, but not posting much, so will have to remedy that !! Next week, I will be back with Celeste for our blog collaboration ALL about coffee and cards .. And I will be attending the Stamp Scrap Art Tour in Hampton, VA this Saturday and Sunday, and will definitely be blogging about that. I have not been to a Rubber Stamp show in over 20 years !! Look out credit cards, HERE I COME !! 

Debra Davison / Meticulosity