Sunday, August 25, 2019

Crafty Elves' Countdown to Christmas - August

Lisa - aka BZ Scrapper - and I have been making a Christmas card each week since January. Sometimes we have even made more !! We post each month on the 25th and it's time for our August  cards. After a brutal month of crazy hot weather, today it is in the 70's, so I was a little bit more in the holiday spirit !! Hard to believe that there are only 4 months until Christmas . Have you started on your holiday cards ?? We hope you will follow along with us as the Crafty Elves count down to Christmas !!


  • For my first card, I used a beautiful stamp from Stampendous - Snowy Postcard .  I stamped the image on watercolor paper with Versafine Clair Nocturne ink . I used my MISTI so I could stamp a few times and get a nice, crisp image.
  • I cut the image to fit on a wood grain card base, leaving a small border around the edge. 
  • The image was colored in a few areas with glitter markers and Faber-Castell PITT Artist  Pens.
  • I adhered the image to the card base with my Pink Scotch ATG Gun.
  • The rooftops were dusted with Sugar Shimmer Fairy-Dust Glitter .


  • Next I have a card using the Spellbinders Merry & Bright Stamp and Die Set . I again stamped the image on watercolor paper using Versafine Clair Nocturne Ink. 
  • The image was cut out with the matching die. 
  • I colored the image with Sharpies and glitter markers.
  • I cut a piece of snowman patterned paper from the CraftSmith Say Freeze collection. 
  • A piece of holiday twine was wrapped around the patterned paper and tied on the front.
  • After adhering the patterned paper to a bright green card base, I popped up the Merry & Bright  die cut with foam dimensionals.


  • I bought the Pink Fresh Simple Joy stamps and dies because the cat reminded me of our Pixie !! I stamped the images on watercolor paper with Versafine Clair Nocturne ink then die cut them. 
  • The images were colored with Faber-Castell PITT Artist pens. It's hard to see but Santa is wearing a cool pair of red framed glasses !!
  • I adhered a piece of green gingham paper to a bright red card base. 
  • A red scalloped border was added to the top of the green gingham and a piece of black wood-grain washi was placed across the bottom.
  • The Santa and cat images were adhered to the card base with my ATG Gun  and the sentiment was popped up with foam dimensionals.


  • My last card was also shared on the If You Give a Crafter a Cookie Challenge blog this week. The cookie  theme included llamas so I created a holiday card with a Fa La La La Llama !! 
  • I cut a piece of Recollections Holiday Bash paper to fit my green card base.
  • The Inkadinkado FaLaLa Llama was stamped in Cracked Pistachio Distress Ink on Neenah Stardust White cardstock, then trimmed to fit on the lower right side of the card.
  • A gold doily was folded over the top left edge of the card to create a corner element.
  • Several pastel candy dots were placed around the llama.
  • I used a border paper punch to make the JOY design, then cut it to place it at the top of the card across the doily.
  • 2 large Teal candy dots were placed on the left side of the JOY design.


Lisa's cards can be found at her blog - Life of a BZ Scrapper . I'm sure her cards are fabulous as always !! We are thrilled that you are joining us as we continue to create our cards and get ahead of the holiday rush !! Have you started yours yet ??  It's never to late to start . We will be back again next month with more Crafty Elf creativity.

Debra Davison / Meticulosity

Coffee & Cards With Deb & Celeste / August

I'm excited that Celeste is back for our our latest post of Coffee & Cards !! This time I chose a Sketch Challenge because I am not very good with them and wanted to think outside the box and out of my comfort zone.  I chose a fairly simple one  but still struggled with ideas. Then I spotted a piece of hoarded paper and my idea took off from there !! 


  • A piece of double-sided Basic Grey Oxford Study Hall paper was trimmed to fit a pink card base. I cut 2 pieces the exact same size and then cut each of the papers on a diagonal . I cut them so I could have the two patterns of the double-sided paper on the front of the card - the books at the top and the floral at the bottom of this card and the reverse on the next one I make.
  • I printed the image with the books and the sentiment from the Teacher no.2 stamp set by Vera Lane Studio  on Neenah Stardust White cardstock.
  • I fussy-cut the woman and trimmed the sentiment .
  • The images were colored with glitter markers and Faber-Castell PITT Artist pens.
  • I adhered the woman to the right side of the card and the sentiment on the upper left. 
  • Glossy Accents were added to the lenses of the glasses.


Celeste is much better at Sketch Challenges than I am, so I'm excited to see what she came u with !! You can find her post at  Crafting Junky . Brian made my coffee today in our French Press - standard Folger's coffee with a bit of sugar and some Half & Half. It was actually very good !!


Thanks so much for stopping by and seeing what Celeste and I are up to this for our August post We hope that you come back next month to see what we create for September !! It will be Pumpkin Spice Season by then !! Are you a fan ?!?!?! 


Debra Davison / Meticulosity

Wednesday, August 21, 2019

August Cookies - Take 2

The Inspiration picture for today's Challenge at  If You Give a Crafter a Cookie is just the cutest !! The llamas, those sunglasses, the cute flowers, those colors !!! I thought I would use the llama, BUT change it up a bit and do a Christmas card . I found the Christmas Llama stamp after the holidays last year for $1.50 and couldn't resist !! This Challenge runs through September 4 and I hope that you will link up a project of your own !!!


I also found a very cute Recollections Holiday Bash  paper pad post-holidays last season and just had to use that sweet pink candy patterned paper for my card ! Do you make holiday cards with non-traditional colors ?? If so, what are your favorite color combos ??


  • I started by cutting a piece of the Holiday Bash paper to fit my green card base.
  • A gold doily was folded over the top left edge of the card to create a corner element.
  • The Inkadinkado FaLaLa Llama was stamped in Cracked Pistachio Distress Ink on Neenah Stardust White cardstock, then trimmed to fit on the lower right side of the card.
  • Several pastel candy dots were placed around the llama.
  • I used a border paper punch to make the JOY design, then cut it to place it at the top of the card across the doily.
  • 2 large Teal candy dots were placed on the left side of the JOY design.
I'm excited to see what my teammates come up with for this Challenge ! You can see their creations over at the If You Give a Crafter a Cookie Blog . Next month's Challenge will celebrate the 5th anniversary of these amazing cookie challenges.  We are very excited and hope you will join us .

Debra Davison/Meticulosity

Wednesday, August 7, 2019

August Cookies - Take 1

You might think this latest challenge from If You Give a Crafter a Cookie is all about Camping... But you would be wrong !! It's also about why you should never get rid of any stamp sets, craft supplies etc. , even if you haven't used them  ( or seen them ) in years !! Okay, okay, I might be exaggerating just a bit, since I have been giving bags and bags of supplies to good homes.  But if something just isn't that easy to part with, well - maybe you should keep it  ( at least for a little longer ) !!


So, when I first saw this challenge inspiration photo, my first thought was - " I don't have any camping stamps !! " I also didn't want to have to buy any - digi or otherwise. I was trying to come up with an idea - maybe use the colors or a camper stamp ( I do have a few of those ) - when I remembered a stamp set I knew I had purchased many, many years ago,  I could picture it - I remembered S'mores and little animals.  But I also thought I had given it away a long time ago.. But, had I really ??  I began searching and after a few hours of frantic digging through box after box, I found it !! S'more Love by Cosmo Cricket - from 2012 and no longer available but still well-loved !! You would have thought I had found the Hope Diamond, or Amelia Earhart's plane or the lost city of Atlantis !!  I know there was a bit of jumping up and down for joy !!!

Sometimes you just need s'more love .....

  • I stamped the marshmallow and the chocolate bar  several times, using Memento Rich Cocoa ink. Each was stamped first on a piece of scrap burlap-patterned paper to create a scene. I also stamped the marshmallow on  white cardstock and the chocolate bar on a piece of  light brown cardstock.
  • The background scene was adhered to a Kraft cardstock base - a starry night paper at the top and the burlap at the bottom.
  • I fussy-cut the marshmallow and the chocolate bar and adhered them on top of their images that were already stamped on the card base paper.
  • I stamped the sentiment on a scrap of yellow wood-grain paper, also in Hot Cocoa ink and placed it at the top of the card base image.
  • Several clear rhinestones were placed on the stars in the night sky.
My fellow Design Team members have also put their creative spin on this theme for Challenge  # 123. Please take a look at them over at the If You Give a Crafter a Cookie blog . Thank you for checking out my latest post. I'm sure that some of you can relate to my "destash" story and why it can be so hard to part with certain items !!

This Challenge runs through August 21 - we would love for you to link up a project with our current theme .. I look forward to seeing what you create !! Thank you for once again visiting me at Meticulosity !!


Debra Davison 

Sunday, July 28, 2019

Coffee & Cards With Deb & Michael / July

While Celeste is enjoying some time away, my coffee loving, card making friend from Brazil ( by way of New York )  - Michael Trent - will be joining me this month. You can find his paper-crafting genius at his blog World of Michael Trent . Our theme for today's post is Christmas in July .


I recently purchased a stamp because it reminded me of our cat, Pixie. As soon as it arrived, I knew it was the perfect stamp for this post !! Pixie is all white with the most beautiful golden eyes. I hope you like my card featuring the Pixster.


  • I stamped the Meowy Catmas image on watercolor paper with Versafine Clair Nocturne Ink  and the sentiment with Abandoned Coral Distress Oxide. It is one stamp - I just inked the upper image and the lower sentiment separately.
  • The image was colored with fine Sharpies.
  • I trimmed the image and then cut red and green mats. 
  • I cut a decorative square from a die and adhered it to the upper left side of the green mat.
  • The image was adhered to the red mat, then the red to the green.
  • I adhered the entire matted image to a Fa-la-la card base. 
  • A touch of gold was added to the cat's eyes - just like Pixie.


I also colored a few more images because I loved it so much !!


I can't wait to see what Michael comes up with - his cards are always fabulous. Take a look over at his blog  post-  World of Michael Trent . He also loves coffee as much as I do so I'm curious to see what he is drinking this morning. I'm having a cup of Honey Bun coffee in my new cat mug  ( I really didn't need a new mug, but I couldn't resist this one at a clearance price on Macys.com ).


Thank you for visiting me here again at Meticulosity !! To celebrate Christmas in July, please comment for a chance to win some Happy Mail from me full of holiday surprises . Until next time, Stay Creative !!

Debra Davison / Meticulosity

Thursday, July 25, 2019

Crafty Elves' Countdown to Christmas - July

It's Christmas in July for the Crafty Elves !! Lisa - aka BZScrapper - and I have been making  a Christmas card each week / 4 or more each month and blogging about it on the 25th of each month . It's been a challenge for me to make holiday cards this month. Here in Virginia Beach, we have had temperatures in the high 90's for a few weeks and to tell you the truth, I was not in a Christmas mood. But I actually did play some holiday music and use a Christmas coffee mug while making a few of these cards to help me get in the holiday spirit. This post will combine a few different  Design Team projects for me as you will see in my descriptions. After you see my cards, be sure to stop by Lisa's blog to see her always  amazing creations !!


For my first card, I used a Hero Arts set - Origami Happy Holidays . I stamped the paper airplane image onto green and red patterned paper and also Neenah Stardust White cardstock. They were then fussy-cut and adhered to an embossed white card. I stamped a sentiment from the same stamp set onto a piece of snowflake patterned paper, cut it out with a tag punch, stapled it and then adhered it to the bottom right side of the card. This was made for my Italian penpal and friend, Letizia !! She recently bought a fun custom stamp with her address and a paper airplane on it, so this set immediately made me think of her !!


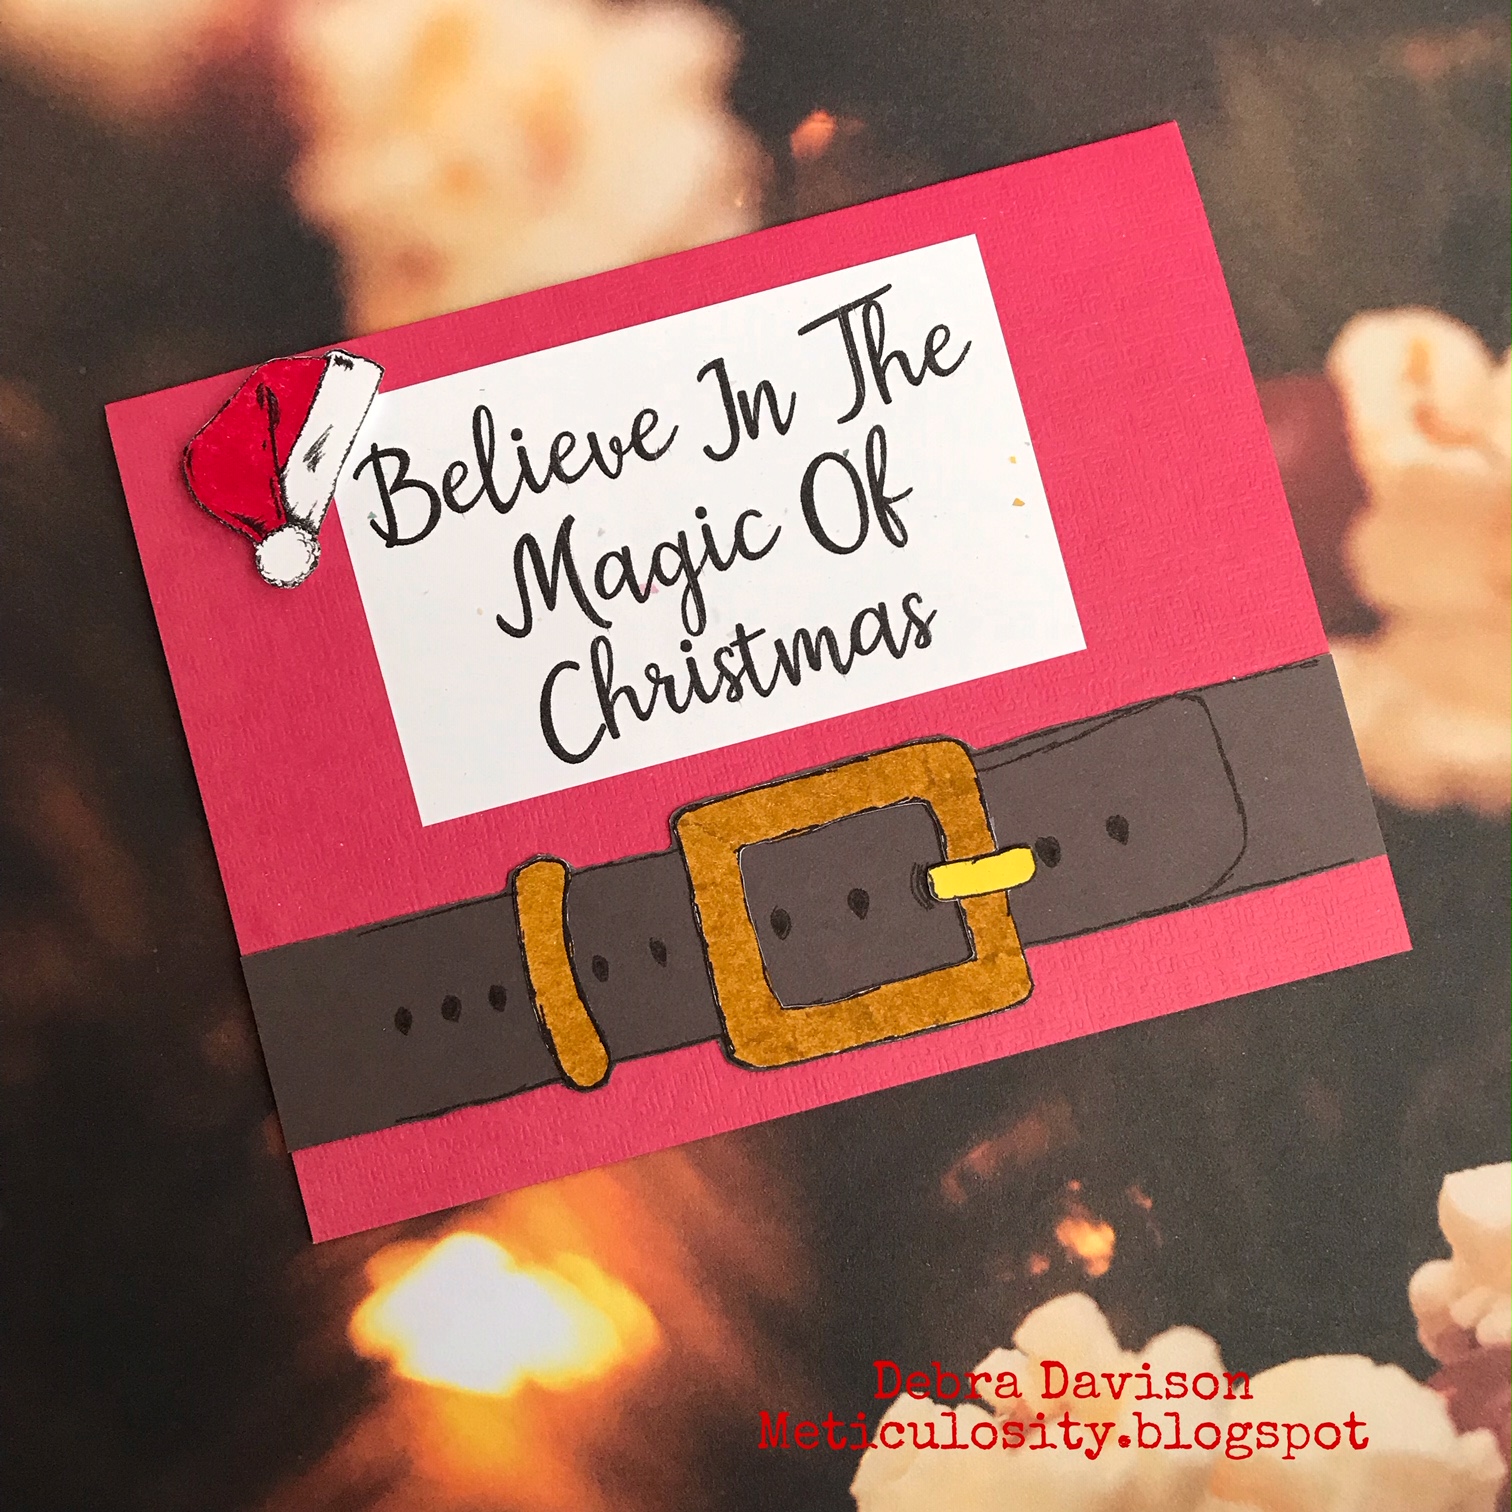
My next card is made with a fun digi stamp set from Polka Dot Orchard - Magic of Christmas . It was designed by my very talented friend and teammate on the Polka Dot Orchard Design Team, Crystal Minkler. We are having a Christmas in July Instagram Blog Hop with the Polk Dot Orchard Team starting today and we hope that you will join us. You can find my post at @djdavison814 on  IG and follow through from there. For this card, I printed the belt, sentiment and Santa hat. The belt was printed on both white and a gray-brown cardstock. I cut out the belt from the gray paper and the buckle and belt loop from white cardstock.The buckle and loop were then colored and adhered on the belt. The Santa hat was also colored.I adhered the sentiment and belt to a red card base.  I then popped the Santa hat up on the corner  of the sentiment with foam tabs. This was a fun card to make !!

 . 

My next card was made with a few favorite stamps from Rubber Moon  -  Merriment by Kae Pea and a house stamp by Joanna Taylor. The house stamp I used is no longer available but the Snowman's House stamp is almost identical. I stamped the Merriment moons on  the top left side of a piece of snowflake patterned paper. The house was stamped on a piece of watercolor paper, colored, cut out into a square and adhered to the lower right of the snowflake paper.  I then stamped the word "merriment" under the house image. I had also stamped the moons on a piece of patterned paper, cut them out and adhered them to the snowflake paper ( I colored one of the moons yellow ). The snowflake paper was adhered to a Kraft cardstock base and a piece of Watercolor Words washi by Rubber Moon was placed down the left side of the card. I love making holiday cards in non-traditional colors !! Do you have a favorite color combo for holiday cards besides red and green ??


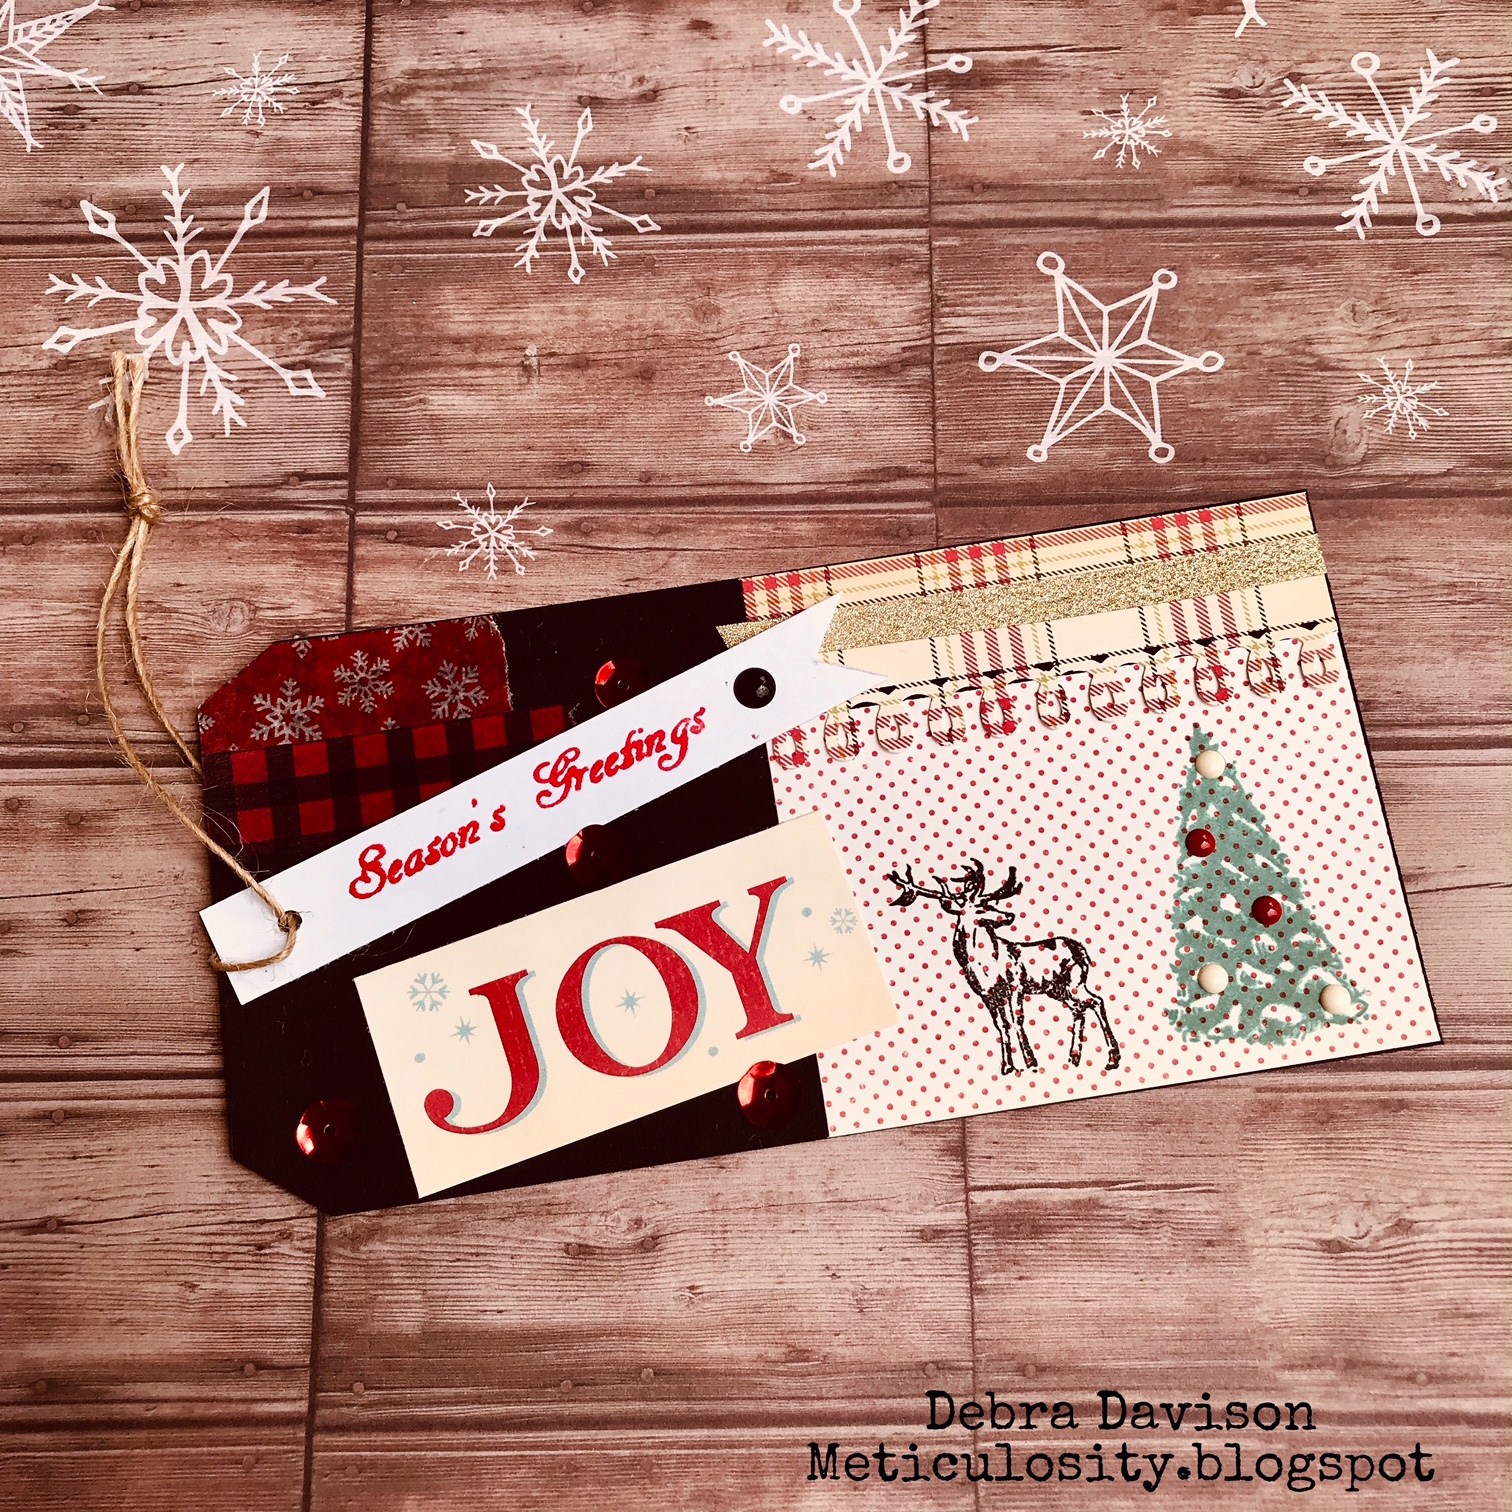
Last but not least is a card/tag for my Christmas in July post at Anthony's Paper Craft. The team is also celebrating Christmas in July by using  some fabulous holiday/Christmas stamps . I used the Winter Scene stamp set that has an amazing variety of smaller stamps suitable for  tags and cards !! I stamped a tree and a deer onto a piece of dotted paper , then used a fun paper punch to make a plaid border that I adhered above the tree. A piece of gold glitter washi was then placed on the plaid border. This entire image was adhered to the bottom half of a black tag. On the upper half of the tag, I adhered a few pieces of washi - snowflake and plaid. The word JOY was adhered at an angle next to the deer.  I then stamped "Seasons Greetings" onto a piece of white cardstock, made a banner out of it and hung it from the hole in the tag.I adhered a  piece of ledger paper to the back of the card to write a holiday greeting on. 


Thank you for joining me for this celebration of Christmas in July.  I really am thrilled to be on several fabulous Design Teams and it was fun to combine these 4 projects in this post !! Make sure you go to Lisa's blog  - Life of a BZscrapper to see what she came up with this month !!

Thanks so much for visiting Meticulosity as we try to inspire you into some holiday spirit as we create a Christmas card each week. We hope to see you back here again on August 25 !!

Until then, Stay Creative !!!


Debra Davison / Meticulosity


Wednesday, July 24, 2019

July Cookies - Take 2

I was a bit stumped at first when I saw the inspiration photo for Challenge # 122 over at If You Give a Crafter a Cookie . I don't have young children or grandchildren and I'm not particularly into Robots.. BUT I  am always up for a Challenge, so I put my thinking cap on and searched the Internet !! I was lucky enough to find a free Robots digi that I really liked -- and as they say, the rest is history !!


My friend Carmelita loves Robots and I will be sending my card to her after this Challenge is complete !! Those 2 little robot cookies are just the sweetest ... How could I not be totally inspired ?!?!?!


  • A white-striped embossed square card was the base for my project.
  • I printed the Dearie Dolls Robots digi onto Neenah Stardust White cardstock. I also printed it onto a piece of gray designer paper.
  • The large robot was fussy-cut out of the gray paper.
  • I trimmed the white Robot print-out to fit on the embossed card, leaving a margin.
  • I trimmed a piece of silver glitter paper to make a thin mat around the robot print-out.
  • The gray robot and white robot printout were colored with a variety of my favorite markers - Distress markers, Sharpies, Flair pens and Faber-Castell. 
  • The sentiments were stamped on the printed image, using a blak and a red ik pad. The sentiments are from an exclusive stamp set by  Heffy Doodle that were made for Creativation a few years ago. 
  • The translation sentiment  was popped up using  foam tabs.

This Challenge runs from July 25 through August 7. We hope that you will create something using our inspiration photo and link it up. Thanks to all of you who have participated in our Challenges in the past..  It really means alot !! Take a look at all of the Design Team projects to see what they all did with those sweet little 'bots !!

Until next time, Stay Creative !!

Debra Davison / Meticulosity