Showing posts with label Spellbinders. Show all posts

Tuesday, April 25, 2023

Crafty Elves' Countdown to Christmas / April 2023

April is almost over and our weather here in Virginia Beach has been one extreme to the next - 80 degrees for a few days this past week, and temps in the 40's this coming week. But I guess the cooler temps are perfect for making a holiday card .. I had some holiday music playing on my laptop as I wrote my blogpost and it put me right in the holiday spirit !!


I used another favorite stamp from Art Impressions - Christmas Village Window . This collection of stamps is so easy to color and the wide variety of designs is fabulous. 


  • I stamped the image on white cardstock with Tuxedo Black Memento ink .
  • The stamped image was colored with my COPICS.
  • Fine clear glitter was used to highlight the edges of the rooftops .
  • I matted the stamped image with a piece of dark blue paper.
  • I placed the completed stamped panel on a piece of patterned paper from  the Winter Wonderland 6x6 paper pad by Spellbinders .
  • A white card base was used for this card .

Michael, and Lisa will also be showing you their holiday creations. Use the links below to see what they have created to inspire you .. It's so nice to have a stash of holiday cards when December rolls around - you can lose some of the holiday stress by starting on your cards along with us . We post every month on the 25th !! Misty is taking a break this month but will be back in May ..


Michael Trent - World of Michael Trent


I'll be linking my card into the Spring Into Christmas 2023 {BYSHC} Linky Party . There are some great sponsors, lots of holiday inspiration and prizes !! Check it out HERE and read all about it !!


#springintochristmas2023byshclp

We hope you are enjoying our posts each month . Have you started your holiday cards ?? I've also started addressing some envelopes to have even less stress when the Christmas season rolls around. Thank you for stopping by .. 

Until next time, stay creative.


Debra Davison / Meticulosity


Saturday, March 25, 2023

Crafty Elves' Countdown to Christmas / March 2023

Here we are with our Crafty Elves' post for March !! We have finally been seeing some signs of Spring here in Virginia. Our temperatures haven't quite figured it out yet, but the pollen is already out in full force. Thanks for  stopping by to see what Michael, Lisa, Misty and I have created to inspire you this month ..


For this month's Crafty Elves project, I am using a fun Holiday Elf stamp designed by my friend, Nola Chandler for Impression Obsession Stamps . Although they are no longer making single red-rubber stamps, they still have many amazing clear stamp sets available. And they will also be releasing some limited edition red-rubber stamps each month.  Holiday Elf is no longer available but you can find Nola's other stamp sets HERE .


  • I stamped Holiday Elf  on Mixed-Media paper with Memento Tuxedo Black Dew Drop ink  .
  • The image was trimmed then colored with my COPICS.
  • I cut 2 pieces of paper from the Spellbinders Winter Wonderland paper pad .The left side of the red patterned paper was cut on the diagonal to show the plaid paper underneath.
  • The completed stamped image was adhered to the patterned papers.
  • A Tim Holtz holiday sentiment was adhered below the stamped image.
  • A turquoise and a red rhinestone were placed as ornaments.
  • The completed panel was adheres to a pale pink card base.

The other Crafty Elves have also been busy with their holiday inspiration. I hope you will go and see what they have created !!


Misty - Jolly Fat Elf


Have you started on your holiday cards yet ?? We will be back every month on the 25th with our designs to get you inspired . It's nice to have a stash of cards available when the holiday rush arrives . Until next time, Stay Creative ..


Debra Davison / Meticulosity


Saturday, June 25, 2022

Crafty Elves' Countdown to Christmas / June 2022

June is here and we are halfway to Christmas. That calls for some blog candy, so comment on this post and you just might be chosen to receive some holiday supplies for your card stash !! I recently shopped online at the Close To My Heart  Stamptacular Sale  and all of my cards this month were made with stamp sets from those purchases. You can shop the sale through June 30 !!


My first 2 cards were made with A Furry Merry Christmas . These are such cute stamps and the cat reminded me of Pixie so I couldn't resist them !! I wanted to do a Clean & Simple design also and these were easily stamped and colored .


  • On a piece of white cardstock, I stamped the Cat with Lights image with Gina K Jet Black Amalgam ink and the sentiment in a bold blue .
  • The image was colored with my COPICS.
  • I used some Echo Park paper and an older ( vintage -  LOL ) Martha Stewart border punch to make the border and then adhered it to the top of the stamped panel.
  • A piece of thin black glitter washi was placed across the middle of the snowflake border for contrast .
  • The stamped panel was adhered to a white card base .


  • I stamped the Cat in Box image and the ornament on white cardstock with Gina K Jet Black Amalgam ink and the sentiment with a Rose Bud Dew Drop ink pad.  .  
  • The image was colored with COPICS.
  • I used Echo Park borders at the top of the stamped panel - a woodgrain and a scalloped button pattern.
  • Red and golden rhinestones were alternated between the scallops.
  • The completed panel was adhered to a green card base.


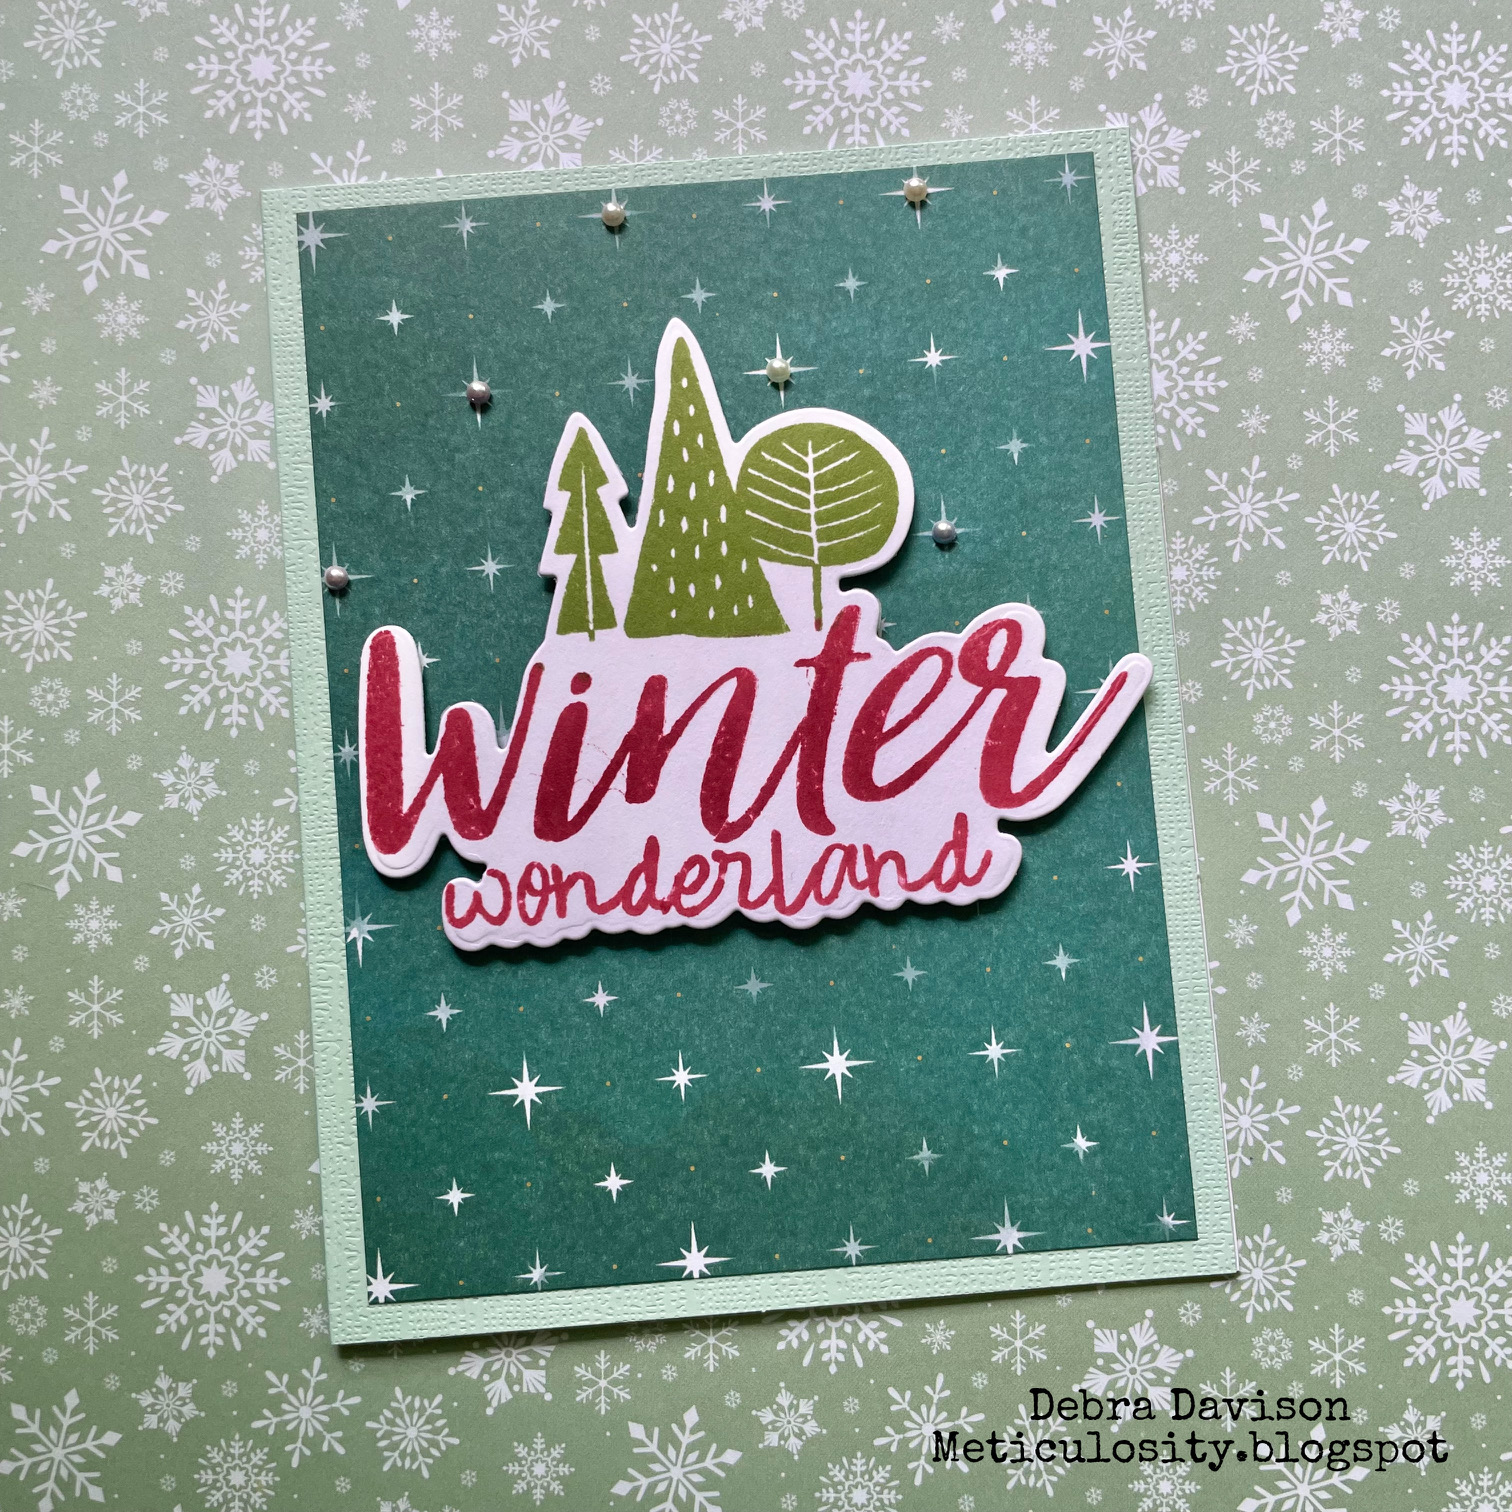
My last 2 cards were made with the Wonderland - Scrapbooking stamp and die set . I used Memento Dew Drop inks for these cards because it is so easy to stamp designs in multiple colors .. I went with traditional colors for one and shades pf blue for the other. 


  • The stamped image was inked with Memento Dew Drop ink pads - Rhubarb Stalk for the sentiment and Bamboo Leaves for the trees .  It was then cut out with the matching die .
  • I adhered a piece of holiday snowflake Spellbinders to a pale green card base .
  • The stamped image was placed on the completed card base with foam tabs.
  • Several small pearls were adhered around the sentiment .


  • I stamped the Cocoa Day image with Paris Dusk ink for the sentiment and Summer Sky for the cup . It was then cut out with the matching die.
  • A piece of blue patterned Spellbinders holiday paper was adhered to a navy card base . It reminded me of a Swedish pattern, maybe a sweater !!
  • The stamped image was adhered with foam tabs to the stamped card base .
  • I think that this is my favorite card this month !!

Have you begun your holiday cards yet ?? Did you know that Hallmark Movie Channel will soon be starting their Countdown to Christmas ?? I've also been addressing my cards to get even a bit more ahead of the holiday rush !! Take a look at Michael's and Lisa's blog posts to see what they've done this month  -- I am sure their cards will be fabulous as always !!

Michael Trent - World of Michael Trent

Lisa Reynolds-Bzibziak - Life of a BZscrapper

Thanks so much for stopping by again as we show you our holiday creations . Be sure to comment here on this blog post for a chance at some fun blog candy - a few holiday goodies to help you make some  cards for your stash !!

Until next time, Stay Creative !!


Debra Davison /  Meticulosity

Thursday, March 25, 2021

Crafty Elves' Countdown to Christmas / March 2021

March is here and it's feeling like Spring but that doesn't mean you can't be getting ready for the holidays !! Michael, Lisa and I are back with our cards as the Crafty Elves Countdown to Christmas As always, I'm excited to see what they make because it always inspires me. I hope that we all inspire you too !!


I've been working full-time during this past year of COVID and creativity is my bliss.. I enjoy looking through all of my holiday stamps and choosing  what I'll be using for my cards. This is the first month that I wasn't sure if I've used a stamp before or not.. I guess I should have kept a list !! Maybe that will be a project for the coming week..


  • This Paula Best "Cat Christmas Tree" stamp is a favorite. I'm not sure if I've used it before  in these posts!! Her stamps are no longer available except on Etsy or eBay etc.. I feel lucky that I have quite a few of them.
  • It was stamped on Strathmore Watercolor paper with Gina K Jet Black Amalgam Ink and colored with my COPICS. 


  •  

    • I made a mini-slimline card with a piece of fun tree paper. I took a 6x6 piece and folded it in half. I am challenged filling all the space of a traditional slimline card so this mini size is perfect !!
    • I used a hexagon paper punch and punched out 7, using coordinating Christmas design paper. I adhered them to the left side of the mini-slimline  in a wreath pattern - using the landscape positioning. 
    • The snowman is from the Snowman Trio 2 set from Anthony's Paper Craft . It was stamped with Gina K Jet Black Amalgam Ink next to the hexagon. 
    • I cut apart a Tim Holtz Idea-ology sentiment and adhered it next to the snowman on the right side of the card. 
    • Red and green rhinestones were placed above and below the sentiment. 


    • This stamp was designed by mu friend, Lindsay Ostrom ! She is a Hallmark movie lover and I absolutely love this stamp - Hallmark Season from Impression Obsession.
    • It was also stamped with Gina K ink on watercolor paper and colored with my COPICS.
    • I used some strips of washi above and below the stamped image. 
    • A Tim Holtz Idea-ology sticker sentiment was placed beneath the stamped image. 
    • Th cute border - stamped and die cut - at the top of the card is from Close To My Heart.


    • This Starry Forest Die Cut Set caught my eye as soon as I saw it !! I was lucky that it was during a Spellbinders sale . I never pay more than $10 for an item during these sales and sometimes find very detailed die sets for $5 or less. 
    • I cut the images out of different colored cardstock and also from a gold metallic paper. 
    • I used several scrap papers to create a background scene and adhered them to a Kraft card base.
    • The images from cardstock were adhered to the  metallic images, leaving a small golden edge showing .
    • The images were adhered to the card base. I used the example on the Spellbinders packaging .. 
    • A Paper House Productions Merry and Bright 3D sticker was placed on the upper left of the finished panel. 
    These were fun cards to make and are a nice addition to my holiday stash !!  Take a look over at Michael's and Lisa's blogs to see what they have created for March. In the upcoming months we will have some Guest Elves joining us and are so excited to see what they create !!


    Comment on this post and I will choose someone at random and send them some fun holiday supplies to make a few holiday cards of their own !! Until next time, stay creative and above all,  STAY SAFE !!


    Debra Davison / Meticulosity

    Sunday, October 25, 2020

    Crafty Elves' Countdown to Christmas / October 2020

    The Crafty Elves only have a few more months until the holiday is here !! I can't believe that it is almost the end of October AND we are still in the midst of COVID. I hope that you all are staying safe and healthy .. 


    Spellbinders had an amazing clearance sale recently and I got some holidays dies for $2 and $3 !! I couldn't resist making several of my cards this month with those dies.  I'm also going to be giving away a bit of blog candy again this month so keep on reading and see how you can possibly be the winner.


    • I used the Spellbinders Hanging Stockings die to cut out the image on a piece of black cardstock.
    • A piece of scrap glittered holly paper was adhered to a green card base,
    • The die-cut image was adhered to a piece of bright red cardstock with Art Glitter Glue . The fine tip makes placing the glue in the intricate cuts much easier !!
    • The red panel was adhered to the holly paper.
    • An Idea-ology Small Talk - Occasions sentiment was adhered on the bottom right of the holly paper.


    • The Spellbinders For You  die was cut out using while glitter cardstock.  It's hard to see in the picture but it has a nice sparkle.
    • The cookie paper, music paper and sentiment are all from the Sugar Cookie Christmas collection from Prima Marketing Inc.. This is an absolutely beautiful collection !!
    • I adhered transparent pink and turquoise sequins to the sugar cookie background paper.
    • I love how changing the background paper with these dies can create a totally different look .. 
    • I will be sending 1 of these For You dies to someone who comments on this blog post . I will choose 1 person randomly.


    • On a pink chalkboard card base, I adhered a piece of foiled birch paper .
    • I stamped the  image from Own Wing from Unity Stamp Company , colored it with my Copics and then fussy-cut it.World
    • The bird was popped up on the background paper using foam tabs.
    • A sentiment from Idea-ology Small Talk - Occasions was adhered in the lower right corner.


    • This might just be my favorite card this month, but I did love them all !! I used the Better Not Pout  stamp set from The Cat's Pajamas PaperArts .
    • I adhered a piece of  Christmas text paper to a navy card base.
    • The cat in stocking image was stamped on white cardstock, colored with my Copics and then fussy-cut. 
    • The stocking was then popped up in the right corner with foam tabs.
    • Transparent sequins were placed around the stocking.

    I know that the other Crafty Elves have been busy making their cards for October. Lisa and I get together on ZOOM sometimes on Sundays with her crafty group. And Michael and I have plans to get creative together sometime soon also.  Take a look at their creations on their blogs ---

    Michael Trent - World of Michael Trent
    Lisa Reynolds Bzibziak - Life of a BZScrapper

    Thanks to all of you for visiting Meticulosity and especially for your wonderful comments !! It means alot to me that you take the time to stop by my creative space.. Until next time, stay safe, healthy and creative !! And don't forget to comment here on this post for a chance to be selected to get that cute For You die to make some cards of your own..


    Debra Davison / Meticulosity


    Sunday, August 25, 2019

    Crafty Elves' Countdown to Christmas - August

    Lisa - aka BZ Scrapper - and I have been making a Christmas card each week since January. Sometimes we have even made more !! We post each month on the 25th and it's time for our August  cards. After a brutal month of crazy hot weather, today it is in the 70's, so I was a little bit more in the holiday spirit !! Hard to believe that there are only 4 months until Christmas . Have you started on your holiday cards ?? We hope you will follow along with us as the Crafty Elves count down to Christmas !!


    • For my first card, I used a beautiful stamp from Stampendous - Snowy Postcard .  I stamped the image on watercolor paper with Versafine Clair Nocturne ink . I used my MISTI so I could stamp a few times and get a nice, crisp image.
    • I cut the image to fit on a wood grain card base, leaving a small border around the edge. 
    • The image was colored in a few areas with glitter markers and Faber-Castell PITT Artist  Pens.
    • I adhered the image to the card base with my Pink Scotch ATG Gun.
    • The rooftops were dusted with Sugar Shimmer Fairy-Dust Glitter .


    • Next I have a card using the Spellbinders Merry & Bright Stamp and Die Set . I again stamped the image on watercolor paper using Versafine Clair Nocturne Ink. 
    • The image was cut out with the matching die. 
    • I colored the image with Sharpies and glitter markers.
    • I cut a piece of snowman patterned paper from the CraftSmith Say Freeze collection. 
    • A piece of holiday twine was wrapped around the patterned paper and tied on the front.
    • After adhering the patterned paper to a bright green card base, I popped up the Merry & Bright  die cut with foam dimensionals.


    • I bought the Pink Fresh Simple Joy stamps and dies because the cat reminded me of our Pixie !! I stamped the images on watercolor paper with Versafine Clair Nocturne ink then die cut them. 
    • The images were colored with Faber-Castell PITT Artist pens. It's hard to see but Santa is wearing a cool pair of red framed glasses !!
    • I adhered a piece of green gingham paper to a bright red card base. 
    • A red scalloped border was added to the top of the green gingham and a piece of black wood-grain washi was placed across the bottom.
    • The Santa and cat images were adhered to the card base with my ATG Gun  and the sentiment was popped up with foam dimensionals.


    • My last card was also shared on the If You Give a Crafter a Cookie Challenge blog this week. The cookie  theme included llamas so I created a holiday card with a Fa La La La Llama !! 
    • I cut a piece of Recollections Holiday Bash paper to fit my green card base.
    • The Inkadinkado FaLaLa Llama was stamped in Cracked Pistachio Distress Ink on Neenah Stardust White cardstock, then trimmed to fit on the lower right side of the card.
    • A gold doily was folded over the top left edge of the card to create a corner element.
    • Several pastel candy dots were placed around the llama.
    • I used a border paper punch to make the JOY design, then cut it to place it at the top of the card across the doily.
    • 2 large Teal candy dots were placed on the left side of the JOY design.


    Lisa's cards can be found at her blog - Life of a BZ Scrapper . I'm sure her cards are fabulous as always !! We are thrilled that you are joining us as we continue to create our cards and get ahead of the holiday rush !! Have you started yours yet ??  It's never to late to start . We will be back again next month with more Crafty Elf creativity.

    Debra Davison / Meticulosity

    Friday, December 18, 2015

    G45 + MPC Challenge

    We have another great challenge with the fabulous Graphic 45. What amazing products they have and the papers I used with my projects have to be some of my all-time favorites !! We were challenged to make projects using a die and a metal embellishment. I'll have to admit that I had a hard time choosing what supplies to use. So I chose the papers first and worked my way from there.

    My card was made for my best friend, Sue. It uses G45 Christmas Rose paper which I think is one of the most beautiful designer papers that I have ever seen..The metal embellishment I used is actually from a box of Chesapeake Bay Frosted Vanilla Tealights. It was attached to the cord wrapped around the box !! This card is a combination Christmas/Friendship. I attached the snowflake with some fun scrapper's floss and added a red rhinestone.


    background stamp by Uptown Design, 
    Glitter paper by American Crafts


    My second project is a Christmas wall plaque. I have had these Christmas tags by G45 for quite awhile and when this challenge came up, I knew I wanted to do something with them.. I combined them with some stamped images, a glittery flower and some Robin's Nest pebbles. The metal plaque  is from Hobby Lobby and I got it for 50% off -- a great score for only $2.00 !! I used a great die cut from Spellbinders that was the perfect size for the Christmas sentiment. I hope you like this project as much as I do. It will hang in my front hall with my other holiday goodies..


    The Robin's Nest pebbles


    I hope you like my projects and have also looked at the other blog posts of the Mountain Plains Crafters Design Team.. Comment on the MPC  blog HERE for a chance to win some crafty goodies... Also if you comment on my blog, I will choose 1 lucky winner to get some samples of my favorite G45 paper..


    MPC Prize


     Thank you so much for visiting Meticulosity ... It is greatly appreciated !!
    Happy Holidays to everyone !!


    Thursday, June 25, 2015

    Patriotical

    Okay, look that word up in your urban dictionary... It means Patriotic AND nautical all at the same time....  And that's what I was going for with my card. Mountain Plains Crafters is hosting a Summer Challenge 2015 sponsored by the amazing May Arts Ribbon.. 'Like" them on their Facebook page  -- you will find all kinds of inspiration there !! To enter our challenge, all  you have to do is link up a Patriotic or Nautical card to our blog post for a chance to win a fabulous prize. Also be sure to check out the other projects by my fellow DT members..

    It's no secret that I am in LOVE with anything woodgrain.. Paper, washi, ribbon, stamps, stickets, embossing folder... So when I saw a cool post by Tammy Tutterow on her blog , I just had to try it.. Just make sure you label the toothbrush before you start using it for paint !! I squeezed a small amount of Tim Holtz Ranger Ink "Spun Sugar" Distress Paint onto my non-stick craft sheet, used an old toothbrush to pick up the paint, then ran the toothbrush up and down the kraft tag to create a woodgrain look.I used a toothbrush with varied lengths of bristles. After the acrylic paint had dried -- you can use a heat gun if you are impatient -- I used a blending tool to ink the entire tag with "Stormy Sky" Distress Ink..Then rub the tag with a clean, dry cloth. Paint creates a resist to the ink and you will remove the ink from the paint, creating a great effect..  A great big thank you to the fabulous Tammy Tutterow !!


    The background paper was a printable design by Rhonna Mask Farrer that she offered free to her Instagram followers. Perfect for this challenge. You can see more of her amazing designs here I used an anchor die from Spellbinders and attached it to my tag using the best adhesive ever for detailed dies, Tombow's Mono Aqua Liquid Glue. It has a pen tip for small areas and is my Go-to glue for my dies ( and everything else ) !! A Nautical ticket roll by Fancy Pants provided the 3 tickets on the right side of my card, And to finish, I used a piece of fabulous May Arts Adhesive Rosettes ribbon. A bit of twine complemented my tag. The fabulous paper as my card's backdrop is from the ever-wonderful DCWV and their "Hey,Sailor" stack.


    If you link up a card to our challenge, you have a chance to win a great prize of some fantastic ribbon from our sponsor -- May Arts Ribbon. And if you comment here on my blog you have another chance to win a great prize of nautical goodies along with some May Arts ribbon !!


    Challenge begins 6/25/15 at 1:00 am ET and ends 7/4/15 at 1:00 am ET 
    Link up a NEW project. No backlinking allowed.
    (Limit of 2 entries).  
    Winner will be announced late on July 4th.  Happy Independence Day! 
    Link up at our blog HERE
    Thanks everyone !!


    Friday, June 12, 2015

    From The Heart for Fathers Day


    Fathers Day brings back many wonderful memories. My father and brother are no longer with us, taken way too soon, I miss them every day. Growing up in Pennsylvania, my family hunted and fished. We spent many weekends in the great outdoors and deer were always  everywhere. At relative's houses in the country, we saw deer in their backyards many times. I wanted to honor the memory of my father and brother and knew this die was the perfect one to use on a card for them.

    The Design Team of Mountain Plains Crafters is celebrating Fathers Day by creating some projects to honor the men in our lives. Check out their blog to see all of our creations and details on supplies. What do you do to celebrate the special men in your life on Fathers Day?? Share a memory here that you have. Maybe you are honoring someone's memory or celebrating someone's first year as a father. 

    We hope you enjoy all of our projects. And stay tuned on June 25 for a new challenge and giveaway.  The theme?  Nautical or Patriotic.  Prize sponsored by May Arts Ribbon

    Background woodgrain paper by Webster's Pages

    Thursday, April 16, 2015

    A Note of Appreciation

    Our group challenge with my gals at Mountain Plains Crafters was to create a card to tell someone how much you appreciate them. Spring flowers needed to be a part of the project. Then we all need to send what we created to the person it was made for. I am sure you all have someone in your life that you owe a thank you note or a note of appreciation. After all, April is National Letter Writing Month so join in the fun and send someone special a little something in the mail.

    A friend of mine who also happens to be my boss will be retiring next month. She is an amazing person and goes above and beyond to be fair and kind to everyone.She is looking forward to spending much more time with her family. And although I will miss her, I wish her all the best... Penny is a wonderful person and I hope retirement is filled with many happy "Grands" days !!! This card is for her..

    For my appreciation card, I used a Sizzix Alterations "On the Edge" die by Tim Holtz for the border and a Spellbinders "Laurel and Bee" D-Lites die. The floral and woodgrain papers are from the My Mind's Eye "Howdy Doody" collection. I finished the card with a sentiment from the Stampin' Up "Pursuit of Happiness" set after sponging the edges of the stamped image with Color Box Turquoise ink. This card will be in the mail to Penny this week..


    Check out all of the creations by the Design Team members of Mountain Plains Crafters on their blog.. Then sit down and create a card or other project, or write a note of appreciation to someone you care about. You will be glad you did !! And thanks for visiting Meticulosity-- it means the world to me that you want to share in my creativity..

    Friday, March 6, 2015

    How Sweet It Is ....

    How sweet it is to share a love of coffee, tea & cocoa with so many others who either linked up to the Spring Coffee Lovers Blog Hop or visited to enjoy all of the nearly 500 projects. My last card used the Tea for Two stamps by Unity Stamp Company. The card base is from the beautiful "Bramble Rose" collection from My Mind's Eye. I placed the Nature's Window diecut from Spellbinders In'Spire on the front of the card with a small piece of Webster's Pages paper in the window cut-out.. A woodgrain stain sample was used for the background of the sentiment. As I wait for Spring's arrival and new leaves to appear, I'll have a nice cup of tea and celebrate how sweet it is....


    How Sweet It Is


    Again, a great big thank-you to everyone who visited Meticulosity during  this Spring Hop. I will be choosing 2 winners at random from the comments and they will receive some Spring goodies !!